
Smocking Tutorial: The Wave Stitch
- Dec 17, 2016
- 1 min read
Updated: Mar 9, 2022

The second of the basic smocking stitches is the Wave Stitch.
In smocking, the Wave Stitch is a stitch that travels directly between two or more levels to form a zigzag line. It consists of a top and bottom closure stitch with a traveling stitch in between.
Stitching the Wave Stitch is as easy as stitching the cable. Begin by prepping your floss and getting your needle into position. (You can read how to do that as well as how to form the cable stitch here). See all of our smocking stitch tutorials in our Smocking Stitches Guide. The wave stitch is usually stitched with 3 strands of floss and is stitched from left to right if you are right-handed and from right to left if you are left-handed.
Stitching the Wave Stitch
Start by stitching an up cable (the first closure stitch).

Move down to the next row and over one pleat, go through that pleat.

Next, stitch a down cable.

Move back up to the row you started on, over one pleat, and take a stitch.

Stitch an up cable.
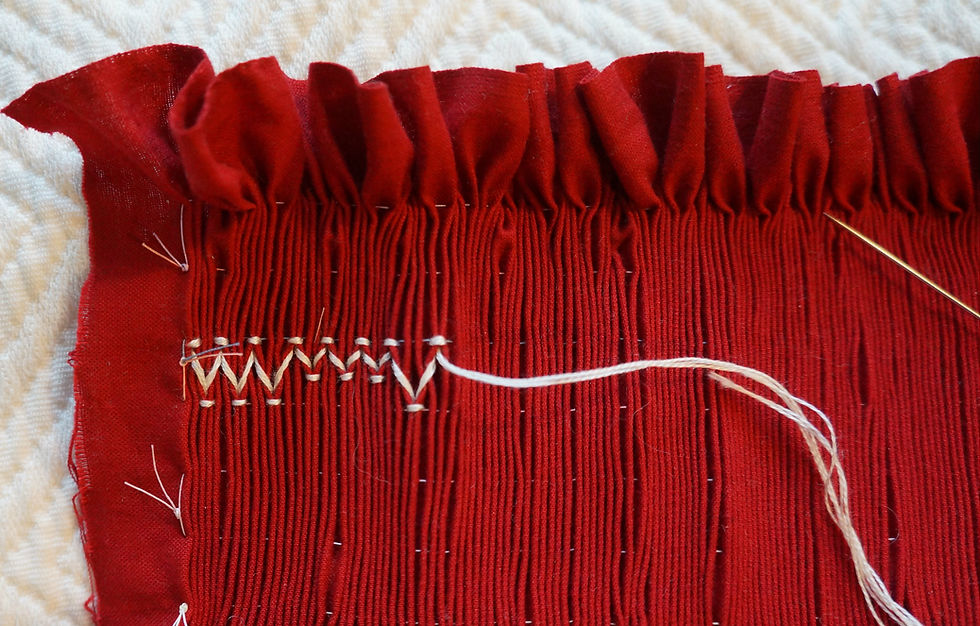
Continue across the row - it's that simple!

Baby waves are formed the exact same way, but only travel down 1/2 space.
Tips for Stitching the Wave stitch:
1. Keep your needle horizontal at all times.
2. Each stitch enters a new pleat.
3. All three strands of floss should show in your stitches and your pleats should not be distorted.
4. There should be two pleats between each up cable and each down cable.

Happy Stitching!


