Honey Honey Bo Bunny: Inserts Can Be Funny!
- Feb 20, 2020
- 4 min read

Sometimes a mistake opens up a new design possibility! Kelli is back on the blog today to show you how to add side panels to a smocked insert in case you find like she did that her insert was too small, or if you just prefer the look of the patterned side panel. Here is Kelli!
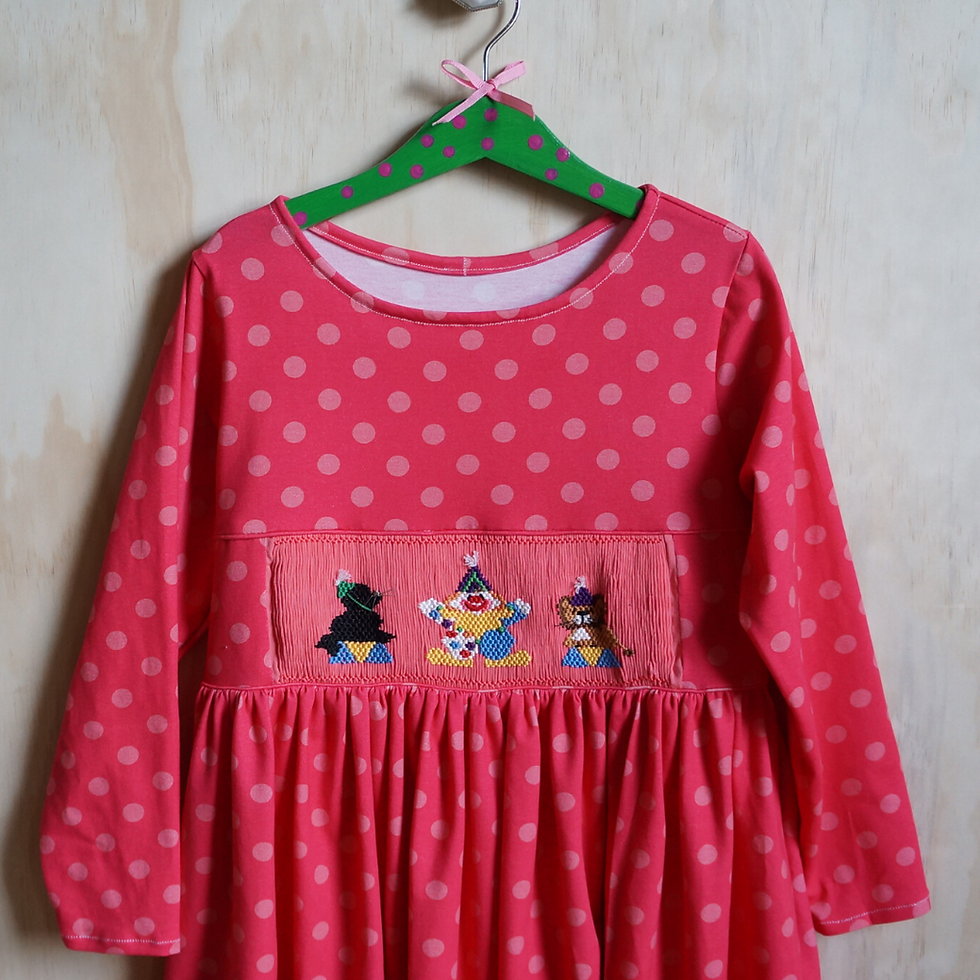
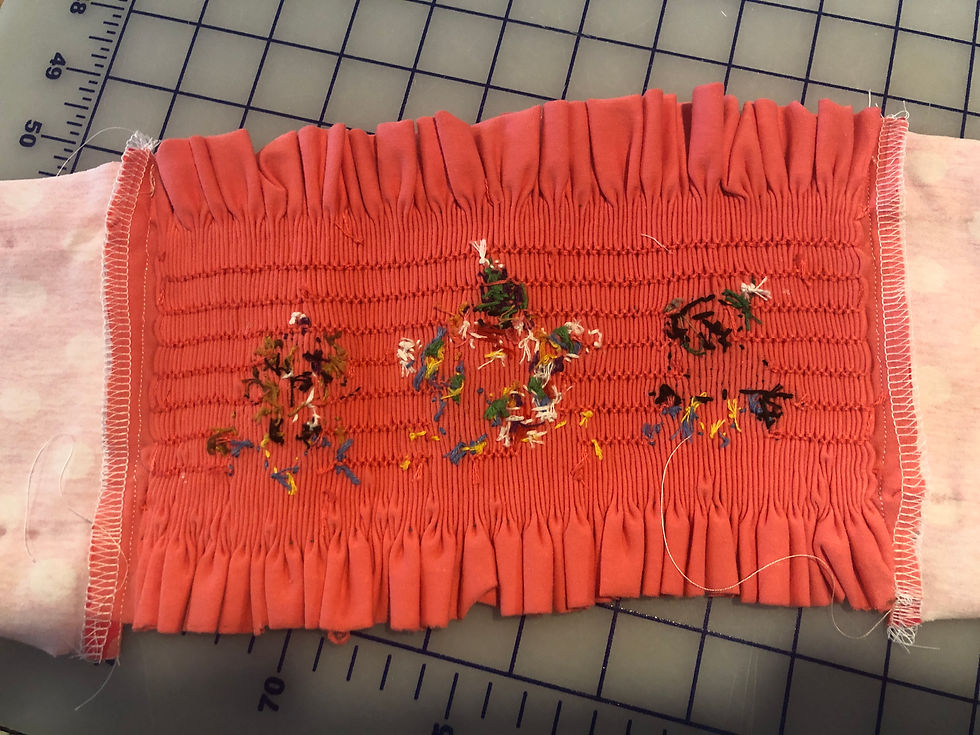
Pink Hollybush Designs has given me a new fabric love affair: KNITS! And Honey is to blame. I am convinced this pattern (and patterns adapted for knits) are the pathway to smocking’s future because parents today (me included) have very little time to iron nor the inclination, because it isn’t really very enjoyable: a necessary evil for those of us that love a crisp, smooth cotton! When I saw the Coral Polka Dot Knit in the Pink Hollybush online store, I had to have it! I knew it was the perfect mate for the Little Memories plate, Three Ring Circus, which I have been toting around for a long time. The soft coral would be a great backdrop for the plate. Of course, the challenge with prints and patterned fabrics like a polka dot, is that they can pleat up funky because the pattern can concentrate blotches of color across the pleated fabric. To avoid this pleating dilemma, you just use a solid color insert. A solid white broadcloth is the workhorse of inserts (you can purchase one here), but I was in luck because Pink Hollybush had a coordinating solid knit I could use. I cut an insert and swiftly pleated it up eager to smock, BUT I didn’t block it BEFORE I stitched it! This is an Oops, like big oops, because now my insert did not match the front yoke width pattern piece at the top and the gathered skirt front at the bottom.
The good news is the Honey pattern has blocking guides for all sizes, so I just needed to make side panels for the insert using the guide as my pattern piece template. Below are the step by step instructions on how to do this, which can really be done for any pattern.
HOW TO ADAPT A YOKE FOR SIDE PANELS:
Fundamentally, all you are trying to do is find the new side seam distance and make yourself a pattern piece to cut out your fabric.
1. Measure from blocking guide center front to the side seam. For the size 8, from the center of the guide to the side seam is 6 1/8th inch.

2. Measure from insert center to the edge of smocking. For my insert, from the center of the smocking to the edge of the smocking is 4 1/4th inch. So my right side panel needs to make up the difference between the edge of my smocking and the edge of the guide (6 1/8th – 4 1/4th = 1 7/8th) . The height will be constant for the yoke. In this case, it is 5 7/8th. The objective again is to move the side seam to the desired distance.

3. Mark your Adjusted Seam Line. Using the paper blocking guide as my pattern piece, from the center I marked 4 1/4 th inch. Draw a vertical line from the top of the pattern piece. This line will be the full height of the pattern piece at 5 7/8th .
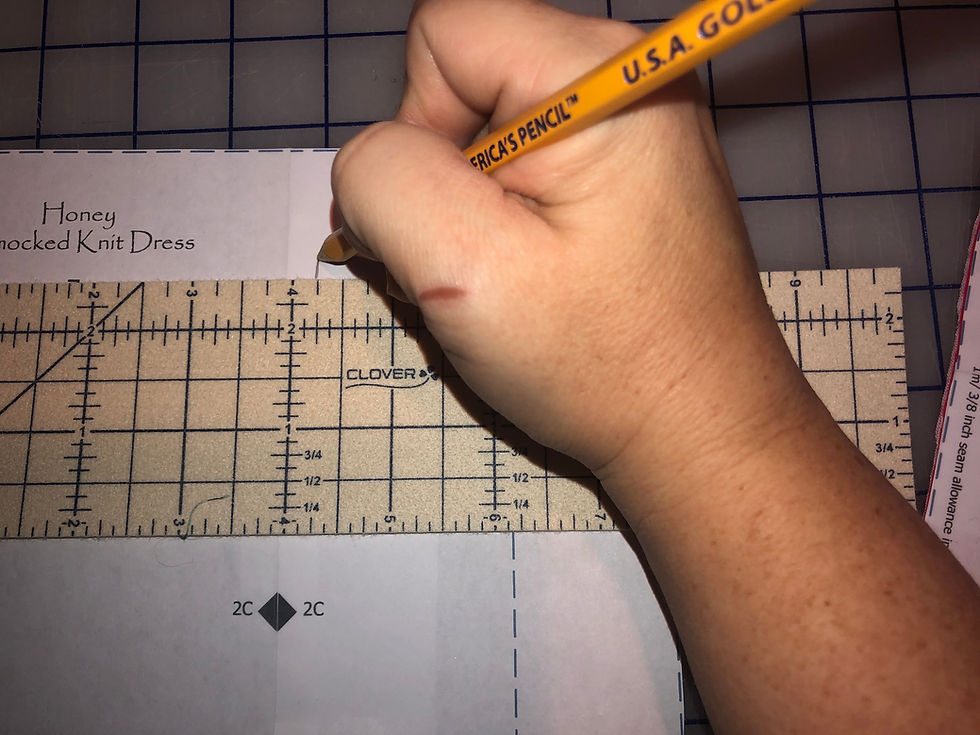
4. Add Seam Allowance Line – Honey uses a 3/8th seam allowance, so draw another line for seam allowance.
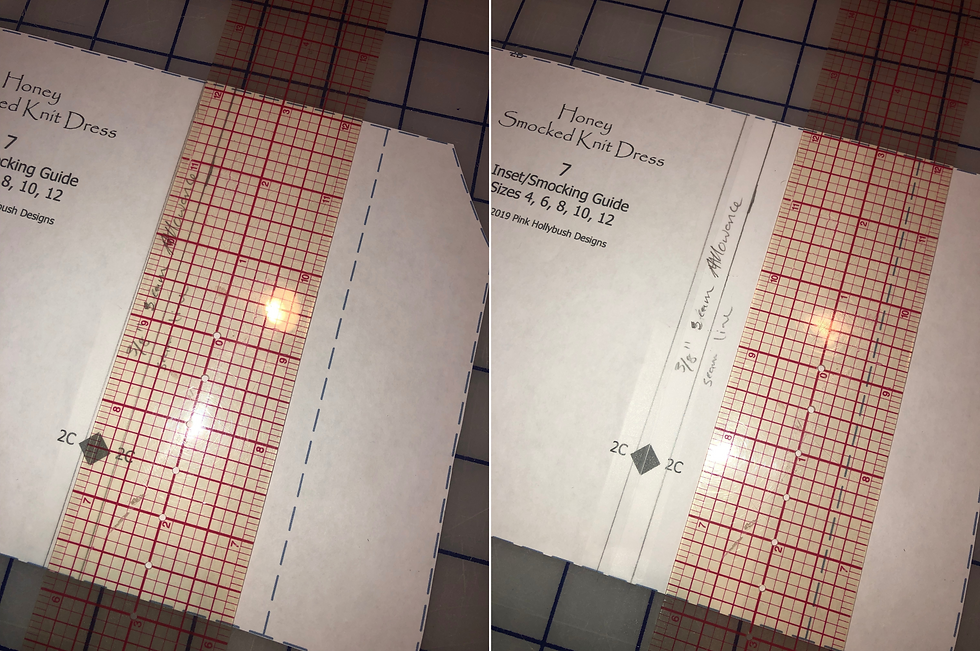
5. Appreciate your Adapted Side Panel Pattern Piece. I just folded the excess paper behind my new pattern piece. You could trace it off as well.

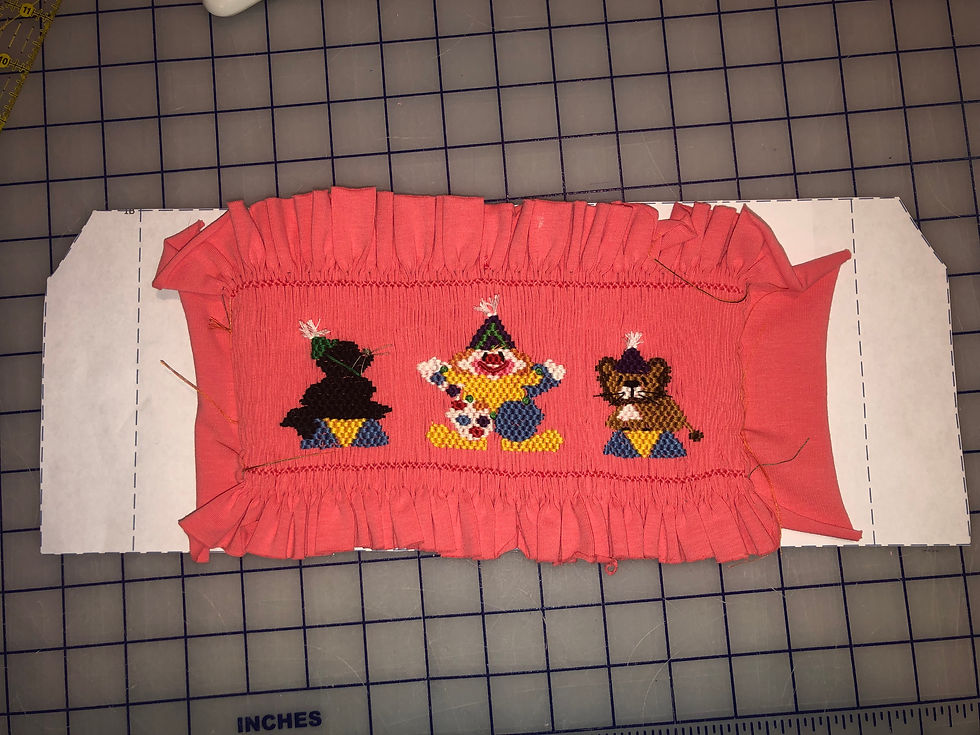
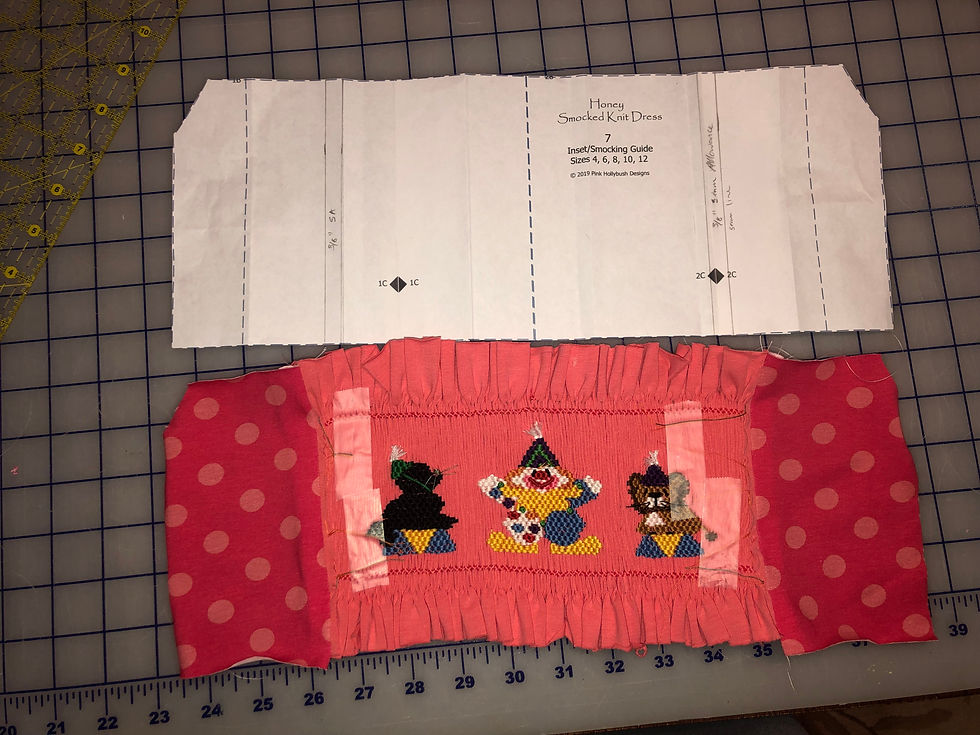
6. Cut Side Panel – With your new pattern piece, cut a side panel out of the fabric. I used the polka dot fabric for my side panels instead of the solid insert because I want to showcase the cute fabric as much as possible.

You will have to repeat this process for the other side panel to make sure your underarm angle lines up with the yoke. The distance from the center of the guide to the side seam will be exactly the same, in this example 6 1/8th inch, but when I measured from the center of my smocking to the edge of my insert on the left hand side, it is 4 ½ inches. In theory it probably should be the same as the right hand side at 4 1/4th, however, it isn’t. As annoying as this is, I just used the same steps as above to make the other side panel.

Once I have my side panels, I sew them on.

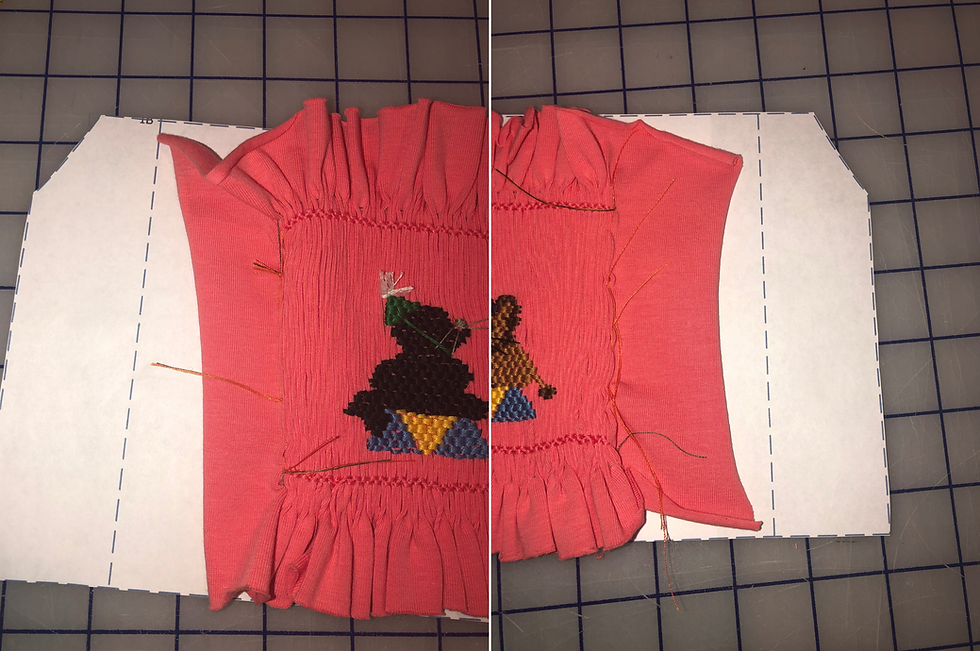
Draw your stitching line on the wrong side of the fabric and then With right sides together, stitch your side panels to the smocking insert. Do this to both sides.

I used my serger for this pattern because it is so quick and easy. I find drawing my seam line on the wrong side of the cut fabric pattern piece helped me to get nice clean stitching up the edge of the smocking.
At this point, you have an adapted smocking insert. Admire your lovely handwork!
Now just follow the directions and finish the dress!