Rolled & Whipped Hem Tutorial
- Aug 15, 2019
- 1 min read

In Heirloom Sewing, a narrow hem is also known as a rolled and whipped edge. It is simple to do and has many uses. This treatment works best on a fine fabric such as a batiste, lawn or voile. In the video tutorial below, I show you how to achieve this finish. Next week, I will have a second tutorial showing how to add lace and pinstitching to this finished edge!
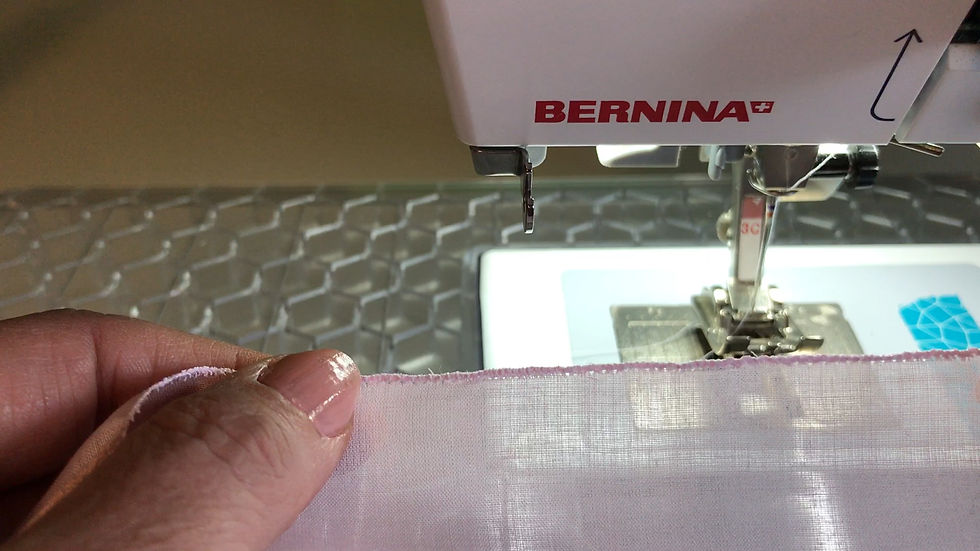
The goal of a rolled and whipped hem is for the edge to roll over on itself. To prepare the fabric, tear the edge and then trim any fuzzies with a rotary cutter. As I mentioned in the video, I set my machine for a zig zag stitch with a width of 3 and a length of .8. You will have to play around with the settings on your machine to find what works best. I also used a number 3, manual buttonhole foot. Choose a foot that holds the fabric firmly but also allows you to see that the edge is curling. The number 3 foot also has a groove in the bottom that lets the rolled edge slide through. When starting it is important to hold the thread tails as you begin. This will help the fabric to start rolling. The needle should go into the fabric on the left and then swing entirely off of the fabric on the right.
I hope you give this hem treatment a tray and next week we will add lace and decorative pinstitching!